
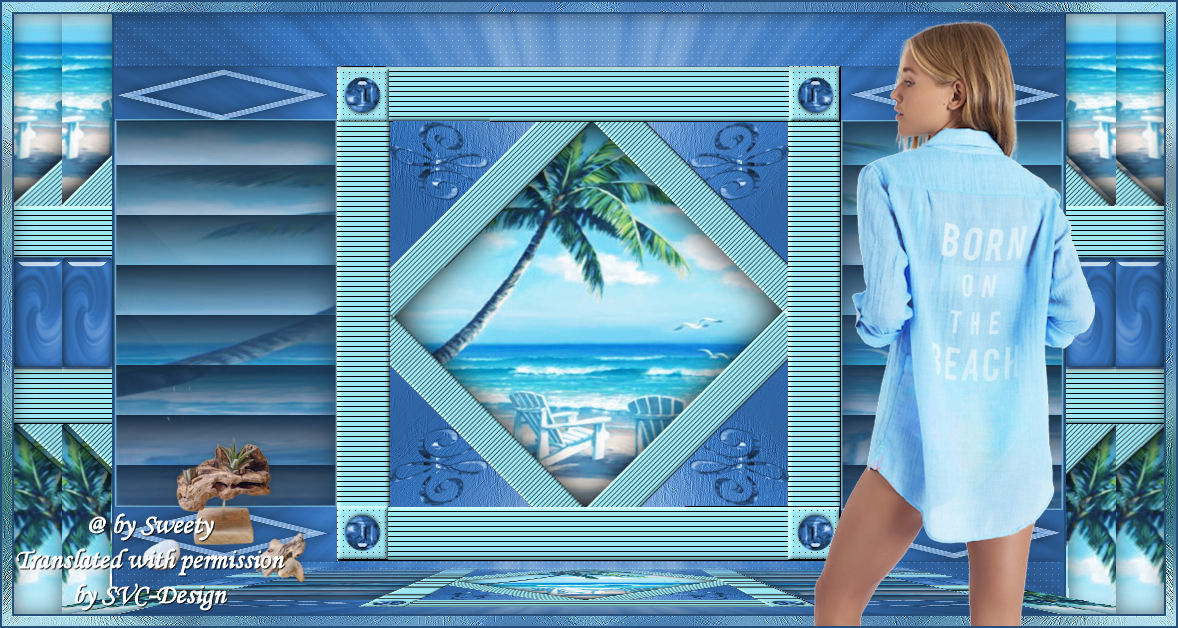
This lesson is made with PSPX9
But is good with other versions.
© by SvC-Design

Materialen Download :
Here
******************************************************************
Materials:
lbdm-masque-238.jpg
LE FOND 160 jpg.jpg
DECO 3D DECOUPE 6 160 SWEETY jpg.png
DECO PERSO 1 160 SWEETY jpg.png
DECO PERSO 2 160 SWEETY jpg.png
DECO PERSO 3 160 SWEETY jpg.png
DECO PERSO 4 160 SWEETY jpg.png
DECO PERSO 5 160 SWEETY jpg.png
SELECTION 1 160.PspSelection
SELECTION 2 160.PspSelection
SELECTION 2 BIS 160.PspSelection
SELECTION 3 160.PspSelection
SELECTION 4 160.PspSelection
SELECTION 5 160.PspSelection
SELECTION 6 160.PspSelection
SELECTION 7 160.PspSelection
SELECTION 8 160.PspSelection
SELECTION 9 160.PspSelection
SELECTION 10 160 .PspSelection
HTB1X6J.jAomBKNjSZFqq6xtqVXaw.jpg
JUIN 2021 ALISON ET ALISON BIS SWEETY.pspimage
JUIN 2021 DECO PLANTE 160 SWEETY.pspimage
******************************************************************
Plugin:
filtro - AP[Lines] – SilverLining - horizontaal
filtro - AP[Lines] – SilverLining – Dotty grid
Filtro - Carolaine and Sensibility - CS_LDots
******************************************************************
color palette
:

******************************************************************
methode
When using other tubes and colors, the mixing mode and / or layer coverage may differ
******************************************************************
General Preparations:
First install your filters for your PSP!
Masks: Save to your mask folder in PSP, unless noted otherwise
Texture & Pattern: Save to your Texture Folder in PSP
Selections: Save to your folder Selections in PSP
Open your tubes in PSP
******************************************************************
We will start - Have fun!
Remember to save your work on a regular basis
******************************************************************
1
Open a new 950 x 600 pixel transparent image
Materials palette - set the foreground color to #5d2e1e and the background color to #ceb193
Selections - select all
Open the image "LE FOND 160 jpg"
Edit - copy
Activate your work
Edit - paste into selection
Selections - select none
Layers - new raster layer
Fill the layer with the light background color
Layers - new mask layer - from image- lbdm-masque-238.jpg
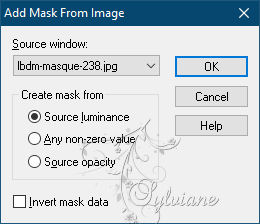
Layers - Merge - Merge Group
2.
Layers - new raster layer
Selections - load/save selection - load selection from disk "SELECTION 1 160"
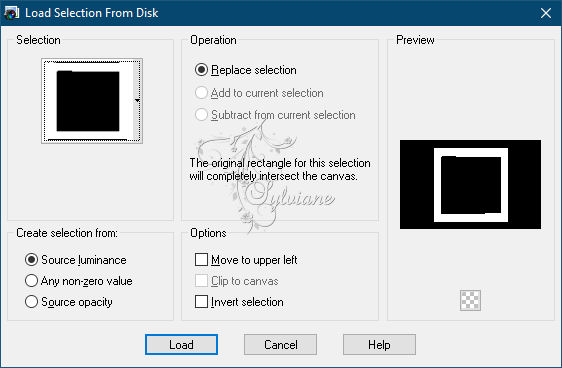
Fill the selection with the light background color
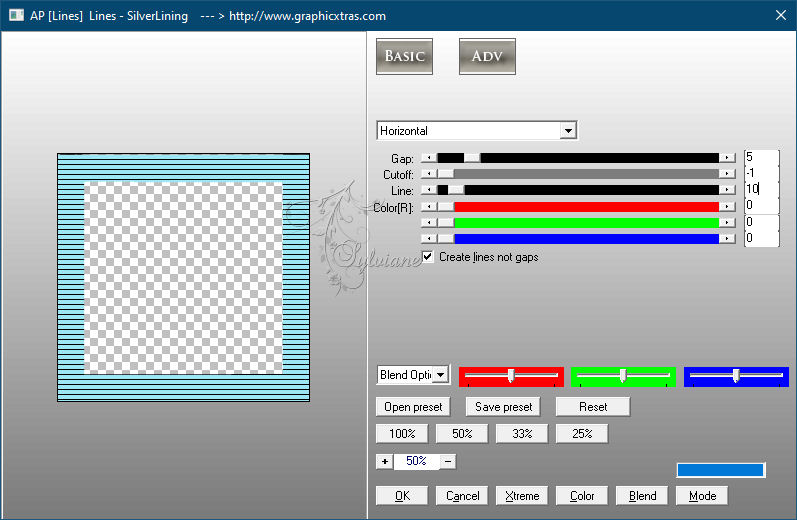
Effects - Plugins - AP[Lines] – SilverLining - horizontaal
Effects - 3D Effects - Inner Bevel
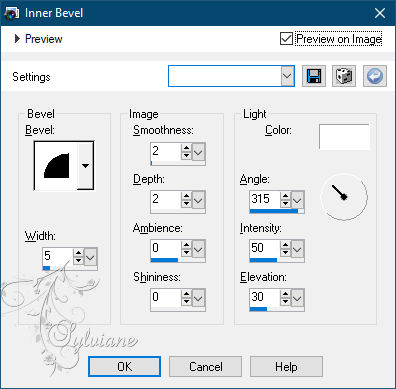
Selections - select none
3.
Selections - load/save selection - load selection from disk "SELECTION 2 160"

Layers - new raster layer
Fill the selection with the light background color
Effects - Plugins - AP[Lines] – SilverLining – Dotty grid
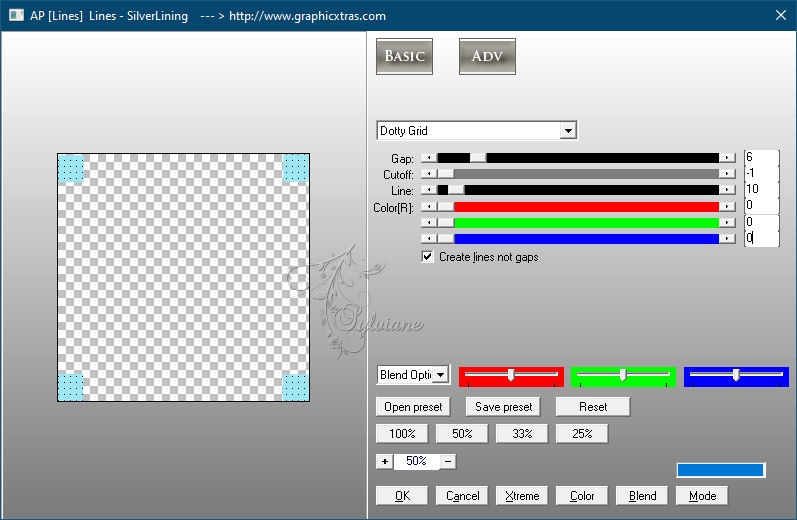
Effects - 3D Effects - Inner Bevel

Selections - select none
Layers - merge - merge down
4.
Layers - new raster layer
Selections - load/save selection - load selection from disk "SELECTION 3 160"
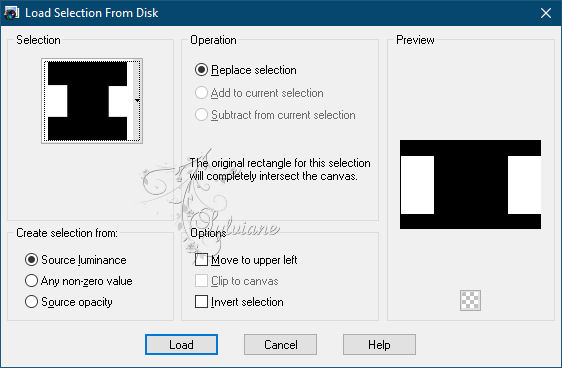
Open the image "a069a5a5"
Edit - copy
Activate your work
Edit - paste into selection
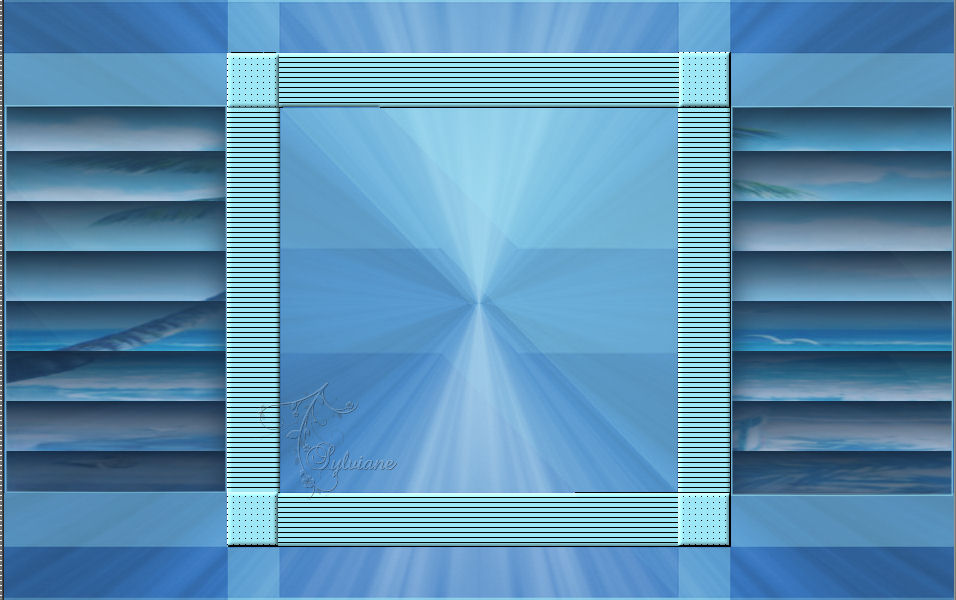
Layer palette - set the layer opacity to 55%
Effects - Texture Effects - Blinds
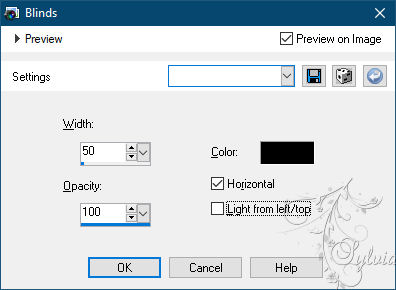
Selections - invert
Effects - 3D Effects - Drop Shadow
0/0/100/50 color:#000000
Selections - invert
Selections - modify - select selection borders
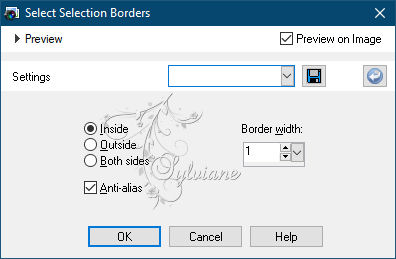
Fill the selection with the light background color
Selections - select none
5.
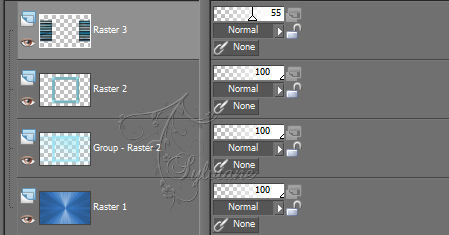
Activate Raster 2
Edit - copy
Edit - paste as new image
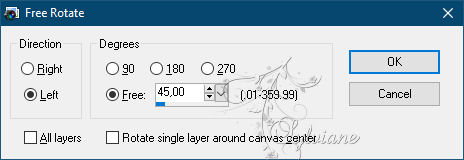
Image - Free Rotate
Activate your work again
6.
Selection Tool (S) - Custom Selection
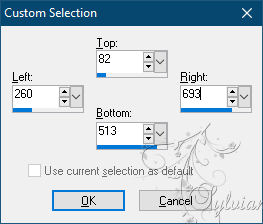
Layer palette - activate Grid 1
Selections – Promote selections to layer
Layers - Arrange - Up
7.
Effects - Artistic Effects - Brush Strokes
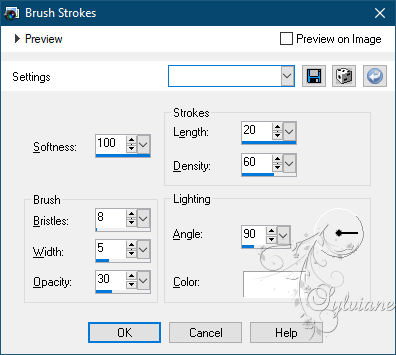
Selections - select none
Activate the image from step 5
Image - resize - 70%
Edit - copy
Activate your work
Edit - paste as new layer
Layers - new raster layer
Layers – arrange – move down
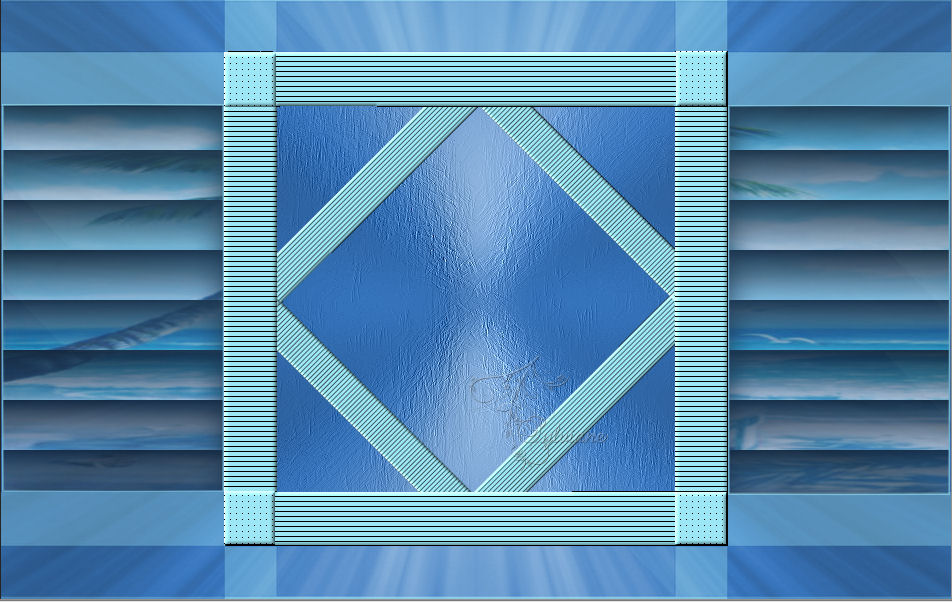
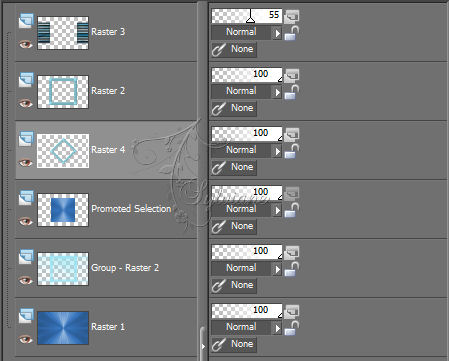
8.
Selections - load/save selection - load selection from disk "SELECTION 2 BIS 160"
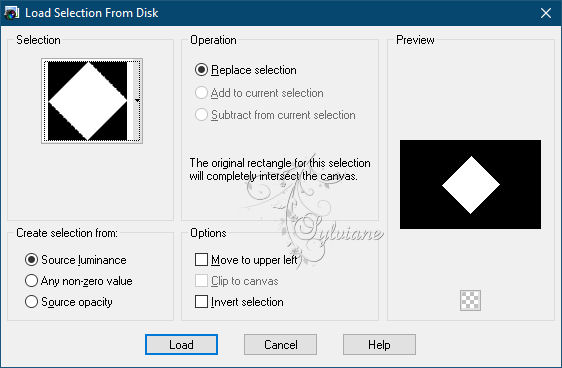
Open the image "a069a5a5"
Edit - copy
Activate your work
Edit - paste into selection
Selections - invert
Effects - 3D effects - drop shadow - settings are correct
Selections - select none
Activate Raster 4
Layers - merge - merge down
9.
Activate Group - Raster 2
Layers - new raster layer
Selections - load/save selection - load selection from disk "SELECTION 4 160"
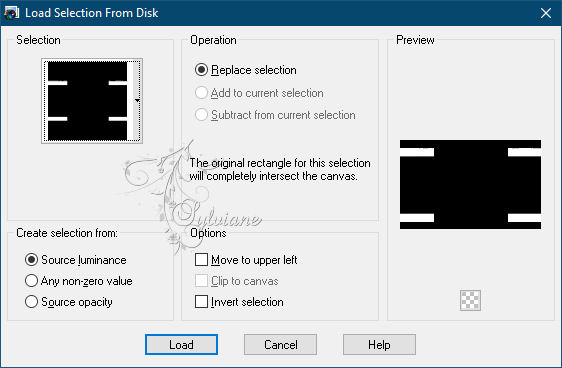
Open the image "LE FOND 160 jpg"
Edit - copy
Activate your work
Edit - paste into selection
Selections - select none
10.
Open the tube "DECO PERSO 1 160 SWEETY jpg"
Edit - copy
Activate your work
Edit - paste as new layer
Layer palette - set the blend mode to luminance (legacy)
Effects - 3D Effects - Drop Shadow
0/0/20/10 – color:#000000
Ativate Raster 3
Open the tube "DECO PERSO 2 160 SWEETY jpg"
Edit - copy
Activate your work
Edit - paste as new layer
Layer palette - set the blend mode to luminance (legacy)
11.
Activate Raster 1
Selections - load/save selection - load selection from disk "SELECTION 5 160"

Selections – Promote selections to layer
Layers - arrange - in front
Effects - 3D Effects - Drop Shadow
0/0/40/20 – color:#000000
Selections - select none
Filtro - Carolaine and Sensibility - CS_LDots
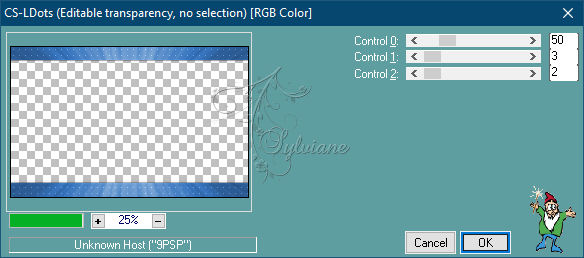
Activate Raster 6
Effects - 3D Effects - Drop Shadow
0/0/40/20 – color:#000000
12.
Open the tube "DECO PERSO 3 160 SWEETY jpg"
Edit - copy
Activate your work
Edit - paste as new layer
Layer palette - set the blend mode to luminance (legacy)
Layers - arrange - in front
Image - add border - 2 pixel dark foreground color
Selections - select all
Image - add border
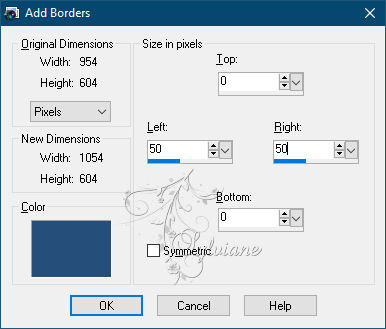
13.
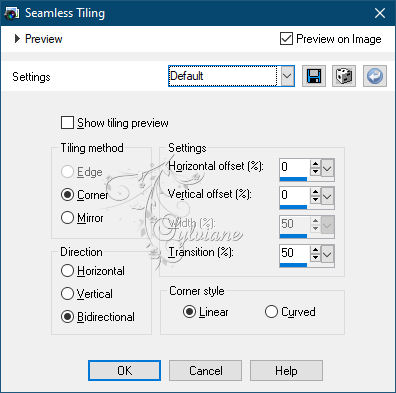
Effects - Image Effects - Seamless Tiling
Selections - invert
Selections – Promote selections to layer
Selections - select none
Selections - load/save selection - load selection from disk "SELECTION 6 160"
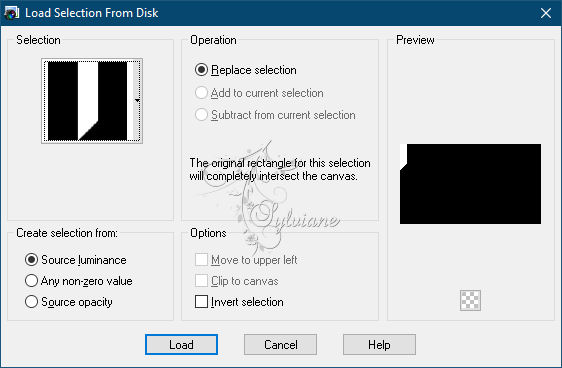
Selections – Promote selections to layer
Selections - select none
Layers - Duplicate
Image - mirror - flip horizontal
Layers - merge - merge down
14.
Activate Promoted Selection
Selections - load/save selection - load selection from disk "SELECTION 7 160"
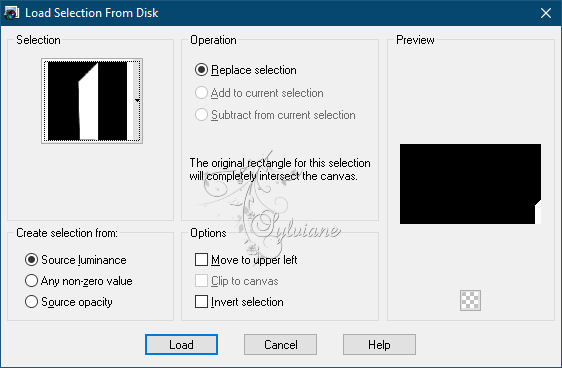
Selections – Promote selections to layer
Selections - select none
Layers - Duplicate
Image - mirror - flip horizontal
Layers – merge – merge down
Layer palette - activate the top layer
Layers - merge - merge down
Selections - load/save selection - load selection from disk "SELECTION 8 160"
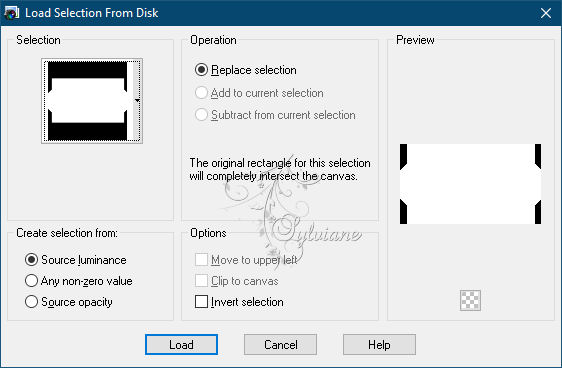
Effects - 3D Effects - Drop Shadow
0/0/60/30 – color:#000000
Selections - select none
Open the tube "DECO PERSO 4 160 SWEETY jpg"
Edit - copy
Activate your work
Edit - paste as new layer
Layers - Merge - Merge Down - 2 x
15.
Edit - copy
Selections - select all
Image - add border
Selections - invert
Edit - paste into selection
Selections – Promote selections to layer
Selections - select none
Activate background layer
16.
Layers - Duplicate
Effects - Geometric Effects - Perspective Vertical
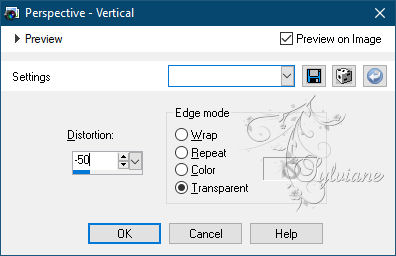
Selection Tool (K) - push the layer down to 550 pixel
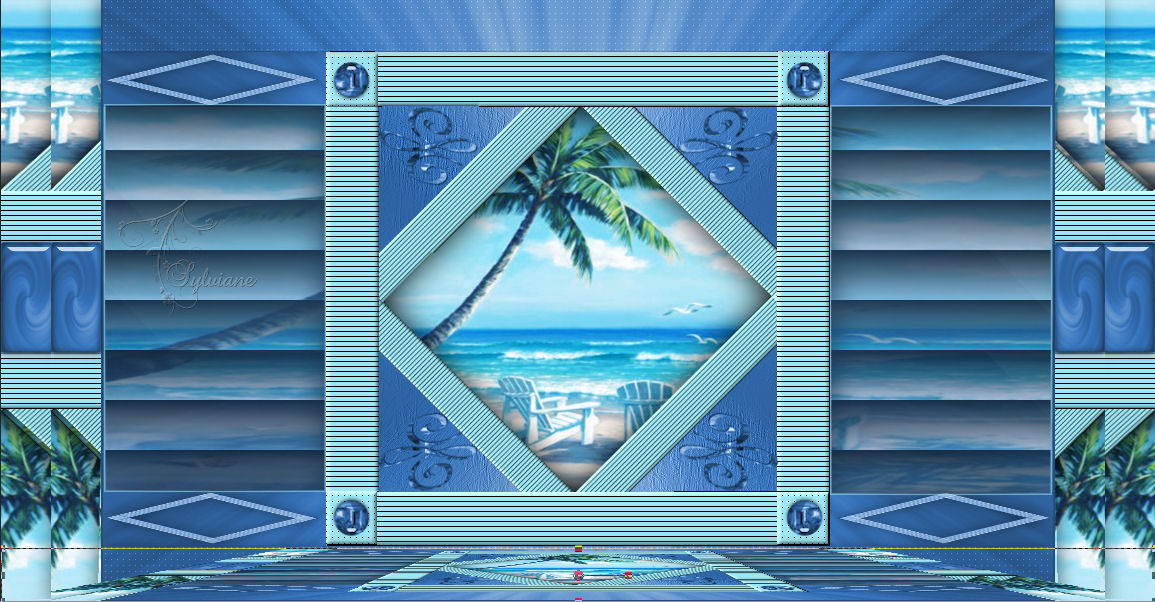
Selections - load/save selection - load selection from disk "SELECTION 9 160"
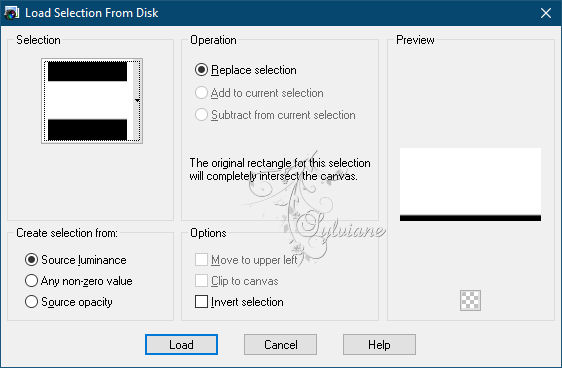
Press delete 4 or 5 times
Selections - select none
17.
Open the tube "JUIN 2021 161 SWEETY"
Edit - copy
Activate your work
Edit - paste as new layer
Image - resize - 70% - uncheck all layers
Image - mirror - flip horizontal
Slide the tube in place
Effects - 3D Effects - Drop Shadow
0/0/20/10 – color:#000000
18.
Open the tube "JUILLET 2021 PIVOINES 1 SWEETY"
Edit - copy
Activate your work
Edit - paste as new layer
Image - resize - 30% - uncheck all layers
Slide the tube in place
Effects - 3D Effects - Drop Shadow
0/0/20/10 – color:#000000
19.
Open the tube "DECO PERSO 5 160 SWEETY jpg"
Edit - copy
Activate your work
Edit - paste as new layer
Selections - load/save selection - load selection from disk "SELECTION 10 160"

Fill the selection with the foreground color
Selections - select all
Image - add border - 10 pixels any color
Effects - Image Effects - Seamless Tiling - Default
Selections - invert
Effects - artsy effects - brush strokes - settings are right

Adjust - sharpness - sharpen
Selections - select none
Image - add border - 2 pixel foreground color
20.
Open the tube "DECO 3D DECOUPE 6 160 SWEETY jpg"
Edit - copy
Activate your work
Edit - paste as new layer
Layers - merge - merge all layers
Image - resize - 950 pixel wide
Place your name or watermark
Save as jpg
Back
Copyright Translation © 2021 by SvC-Design